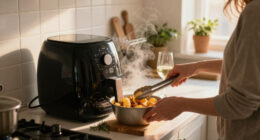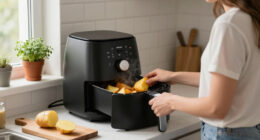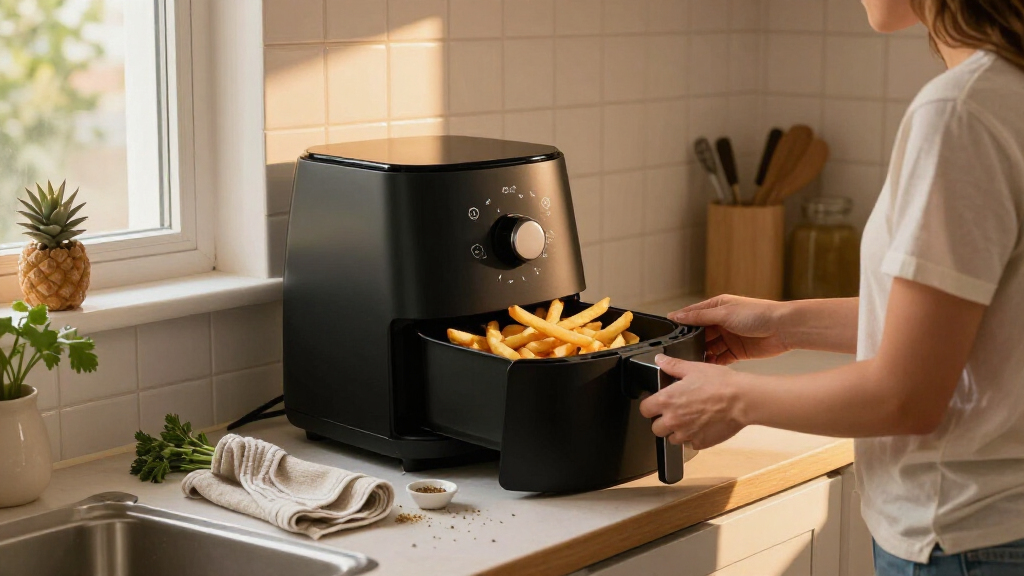
This guide walks you through choosing the right air fryer for a small kitchen, finding a safe spot for it, running the required first-time setup, and cooking your first batch of food. It is written for beginners — no prior air fryer experience is assumed — and for people whose counter space is limited, whether that means a studio apartment, a dorm kitchenette, an RV, or a shared kitchen with one free square foot of counter. By the end, you will have a working air fryer positioned safely, cleaned and seasoned, and your first successfully cooked meal, plus a routine for using it without cluttering your kitchen. Expect the whole process to take 1-2 hours including shopping, or about 45 minutes if the air fryer has already arrived.

Get kitchen staples and gadgets delivered free — and shop member deals
- Fast, free delivery on millions of items
- Access to Prime Big Deal Days deals on October 6–7
- Prime Video, Amazon Music and more included

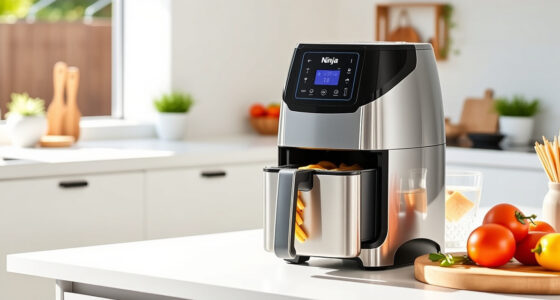
Ninja AF101 Air Fryer, 4 Qt, 4-in-1, Grey
- ✔ Capacity: 4 quarts
- ✔ Functions: Air fry, roast, reheat, dehydrate
- ✔ Temperature range: 105°F–400°F
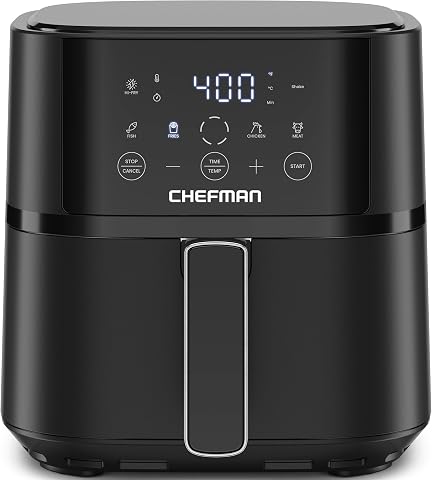
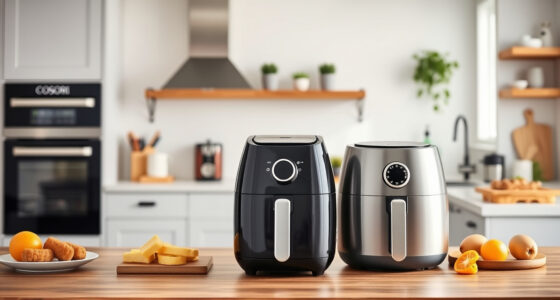
Chefman 4 QT Compact Air Fryer with Hi-Fry, Black
- ✔ Capacity: 4 quarts
- ✔ Max temperature: 450°F (Hi-Fry finishing)
- ✔ Controls: Digital touchscreen, 4 presets

Chefman 2 Qt Mini Air Fryer, Black
- ✔ Capacity: 2 quarts
- ✔ Max temperature: 400°F
- ✔ Controls: Capacitive digital touchscreen
Difficulty: Beginner | Time: 1-2 hours (including shopping and first cook)
What You’ll Need
Tools & Materials:
- An air fryer sized 2-4 quarts for very tight spaces, or 4-6 quarts if you cook for two people
- A stable, heat-resistant counter surface with at least 5 inches of clear space behind the unit and 3 inches on each side
- A standard 3-prong grounded outlet on its own circuit (no extension cord)
- Dish soap, a non-abrasive sponge, and a clean dish towel
- A small amount of cooking oil (any neutral oil) and a paper towel
- Food for a first test cook: frozen fries, chicken wings, or breaded items work well
- Kitchen tongs or a heatproof spatula, and instant-read thermometer if cooking raw meat
- A tape measure or ruler for checking counter clearance
Knowledge:
- Basic kitchen safety awareness (hot surfaces, hot oil residue)
- Ability to read a control panel or dial and set a time and temperature
Before buying, measure your counter depth, width, and the vertical clearance under any cabinets above the counter. Small kitchen mistakes almost always come from buying a unit that is too tall for the space or too deep for the counter. Also check your circuit: most air fryers draw 1,200-1,700 watts, and plugging one into the same outlet as a microwave or kettle can trip a breaker.
Ninja AF101 Air Fryer, 4 Qt, 4-in-1, Grey
The Ninja AF101 takes our top spot because it is the only model here that genuinely earns counter space by replacing other appliances. Its four-in-one functionality — air fry, roast, reheat, and dehydrate — covers jobs that would otherwise require an oven or a separate dehydrator, and the 105°F low end is what makes true dehydration possible. Neither Chefman can operate that low, which is a meaningful capability gap, not a spec-sheet footnote.Performance-wise, the 1550-watt heating system and ceramic-coated nonstick basket deliver the consistent crisping Ninja is known for, and the basket plus crisper plate combo fits a full 2 pounds of fries — real dinner capacity for two to four people. Compared with the Chefman 4 QT, the AF101 trades a wider and taller body for a smarter processor that adjusts fan speed across functions. That means it cooks more evenly across a broader range of tasks, but it demands roughly the footprint of a small bread maker rather than a slim column.The tradeoff for that versatility is twofold. First, its 13.6-inch depth is the largest footprint in this lineup, so buyers with galley kitchens or shallow counters should measure first. Second, it tops out at 400°F, so it can’t match the Chefman 4 QT’s 450°F Hi-Fry finishing burst for maximum crunch on breaded foods. If you mostly reheat frozen snacks and want the crispiest possible tenders, the Chefman may serve you better for less counter commitment.
Pros:
- Four cooking functions genuinely replace other appliances
- 105°F–400°F range enables low-and-slow dehydration
- Ceramic-coated nonstick basket and crisper plate are dishwasher safe
- Fits 2 lbs of fries — real capacity for 2–4 people
Cons:
- Largest footprint of the three at 13.6 inches deep and 10.6 lbs
- 400°F ceiling trails the Chefman 4 QT’s 450°F Hi-Fry mode
- Premium feature set is overkill if you only air fry
Best for: Small households that want one appliance to air fry, roast, reheat, and dehydrate without sacrificing full meal capacity.
Not ideal for: Buyers with extremely shallow counters or those who only reheat frozen food and don’t need dehydrate or roast functions.
Bottom line: The most capable and versatile compact air fryer here — pick it if you want one machine doing four jobs well, and skip it only if counter depth is your hard limit.
“The most capable and versatile compact air fryer here — pick it if you want one machine doing four jobs well, and skip it only if counter depth is your hard limit.”
Chefman 4 QT Compact Air Fryer with Hi-Fry, Black
The Chefman 4 QT is our value pick because it matches the Ninja’s family-sized capacity while taking up less horizontal space and undercutting it on simplicity. Its sleek, narrow vertical design squeezes a full 4-quart basket into a column that fits under cabinets or slides into a cabinet between uses — exactly what a small-kitchen buyer needs. Where the Ninja spreads out, this model grows upward.Its signature differentiator is Hi-Fry technology: a 450°F finishing burst in the final two minutes of cooking that produces an extra-crisp exterior on fries, tenders, and breaded items. That 50-degree advantage over the Ninja’s ceiling is the single most tangible performance edge in this comparison for anyone whose priority is crunch. The touchscreen with four presets and a mid-cycle shake reminder keeps operation approachable for beginners, and automatic shutoff when the basket is removed adds sensible safety for tight quarters.Where it falls short of the AF101 is range and versatility: there’s no dehydrate mode, no 105°F low setting, and fewer cooking programs, so it’s a one-trick (if excellent) air fryer rather than a multi-appliance. Compared with its 2-quart sibling, it offers double the capacity for households of two to four, but it’s noticeably heavier on the counter and won’t tuck into a cabinet as effortlessly. If you cook real meals most nights, though, that extra capacity is worth the extra inches.
Pros:
- 450°F Hi-Fry mode delivers the crispiest finish in this lineup
- Narrow vertical build minimizes countertop footprint
- Shake reminder and four one-touch presets simplify cooking
- Dishwasher-safe nonstick basket and rack
Cons:
- No dehydrate function or low-temperature range like the Ninja
- Only four presets — less programmable versatility
- Bulkier to store than the 2-quart Chefman for solo households
Best for: Value-focused cooks serving 2–4 people who want maximum crispness from a narrow, beginner-friendly machine.
Not ideal for: Anyone wanting dehydration or wide-temperature cooking, or solo cooks who’d never fill a 4-quart basket.
Bottom line: The smartest buy for most small kitchens: near-premium crisp performance and full meal capacity in the narrowest 4-quart body here.
“The smartest buy for most small kitchens: near-premium crisp performance and full meal capacity in the narrowest 4-quart body here.”
Chefman 2 Qt Mini Air Fryer, Black
When counter space is the deciding factor above all else, the Chefman 2 Qt Mini is the pick that makes the least demand on your kitchen. At roughly 10 by 10 by 8.3 inches and under six pounds, it’s the only model in this lineup that genuinely fits inside most cabinets and comes back out without a workout. For studio apartments, dorms, RVs, and offices, that portability is the whole point.Despite its size, it doesn’t feel like a toy: the capacitive touchscreen offers full time-and-temperature control up to 400°F, and the same audible shake reminder found on the 4-quart Chefman keeps results crisp. The square basket design squeezes usable capacity out of the small frame, and the nonstick basket and rack go in the dishwasher just like its bigger siblings’. In daily use, it’s best understood as a one-to-two-person appliance — a couple of chicken breasts, a single serving of fries, reheated leftovers.The honest tradeoff is capacity and power. At 900 watts and 2 quarts, it cooks smaller batches more slowly than either 4-quart model, and hosting even two guests means cooking in shifts. It also shares the family’s 400°F ceiling without the Hi-Fry mode, so it can’t match the larger Chefman’s finishing crunch. This model makes the most sense for someone who eats alone most nights; a household of three or more will find it frustrating, and the step up to the Chefman 4 QT is the better long-term call.
Pros:
- Smallest and lightest footprint here — stores in a cabinet
- Full touchscreen control despite miniature size
- Shake reminder for crispier results
- Dishwasher-safe nonstick basket and rack
Cons:
- 2-quart basket limits meals to 1–2 people
- 900 watts means slower cooking than the 4-quart models
- Caps at 400°F with no Hi-Fry finishing mode
Best for: Solo cooks and couples in studios, dorms, or RVs who value a tiny footprint over batch capacity.
Not ideal for: Families or anyone who entertains — 2 quarts means cooking in multiple rounds.
Bottom line: The right choice when space truly is the constraint — just accept that you’re trading batch size and speed for the smallest countertop demand in this lineup.
“The right choice when space truly is the constraint — just accept that you’re trading batch size and speed for the smallest countertop demand in this lineup.”
As an Amazon Associate we earn from qualifying purchases.
Before You Start
Three things to confirm before the air fryer arrives or is unboxed. First, measure your available counter space in three dimensions — width, depth, and height — and write the numbers down. Air fryers need ventilation space around them; a unit that fits when cold can still be a fire risk when its exhaust vents are blocked. Second, identify an outlet that is not shared with another high-wattage appliance. If your kitchen has only two outlets, plan which appliance gets unplugged when the air fryer runs. Third, decide on storage now: if you plan to store the air fryer in a cabinet between uses, choose a model under 12 inches tall with a detachable basket, and confirm the cabinet shelf can hold 10-15 pounds.
Step-by-Step Instructions
Step 1: Measure your space and pick the right size air fryer
Take your written counter measurements to the store or product listing and choose a model whose listed dimensions are at least 2 inches smaller than your space in every direction. For one person or very tight counters, choose a 2-3 quart compact model (roughly 9-11 inches wide). For two people, choose a 4-6 quart model. Avoid large dual-basket models unless you have at least 16 inches of clear counter width — they are excellent cookers but wrong for a small kitchen.
Tip:If storage is your main constraint, look for a drawer-style basket model rather than one with a flip-top lid. Drawer models slide into shallow cabinets more easily and need less overhead clearance to open.
Check: The air fryer fits on your counter with at least 3 inches of clearance on the sides, 5 inches behind, and nothing within 5 inches above the vent area.
Step 2: Position the air fryer safely
Place the unit on a flat, stable, heat-resistant surface away from the edge of the counter. Pull it forward so the back vent faces open air, not a wall or window blind. Plug it directly into a wall outlet — never into a power strip or extension cord. Keep curtains, paper towels, dish cloths, and cereal boxes at least 12 inches away from the sides and top.
Tip:Never run an air fryer under a closed upper cabinet. The exhaust vent releases very hot air that can damage cabinet finishes and, over time, create a fire hazard. If your only spot is under a cabinet, pull the unit to the counter edge while it runs and slide it back after it cools.
Check: You can slide the basket or open the lid fully without hitting anything, and the plug sits snugly in a wall outlet with no adapter or strip in between.
Step 3: Unbox, remove all packaging, and wash the removable parts
Unbox the unit and remove every piece of plastic, cardboard, and tape, including inside the basket and around the heating element. Remove the basket and any crisper tray or rack. Wash these parts in warm soapy water with a non-abrasive sponge, rinse, and dry completely. Wipe the interior cavity and exterior with a damp cloth, then dry.
Tip:Check inside the cooking cavity with a flashlight for packing spacers or plastic film — a leftover piece will melt and smoke on the first run. Do not immerse the main unit in water; only the removable basket and tray are washable.
Check: All packaging is discarded, and the basket, tray, and interior are clean and completely dry.
Step 4: Run the empty burn-off cycle
Place the empty basket in the unit. Set the temperature to 400°F (200°C) and the timer to 10 minutes, then start it. This burns off manufacturing residue. Expect a slight plastic smell and possibly light smoke — run your kitchen exhaust fan or open a window during this cycle.
Tip:If smoke is heavy rather than light, stop the machine, let it cool, and recheck for leftover packaging inside the cavity before running again.
Check: The cycle completes, the smell fades within a few minutes, and there is no visible smoke by the end.
Step 5: Do your first test cook with frozen fries
Preheat the empty air fryer at 380°F (195°C) for 3 minutes. Add a single loose layer of frozen fries to the basket — do not fill past the halfway line. Cook at 380°F for 12-14 minutes, pulling the basket out halfway through to shake or toss the fries with tongs. When the timer ends, check that the fries are golden and crisp.
Tip:Cooking from a cold start works but adds 2-3 minutes. Preheating gives more predictable results, especially with breaded and frozen items.
Check: Fries come out golden and crisp on the outside, hot inside, with no pale or soggy spots.
Step 6: Handle food safely when cooking raw meat
When you move beyond fries, pat chicken wings, thighs, or cutlets dry with a paper towel, brush lightly with oil, and season. Cook in a single layer, flip halfway through, and check doneness with an instant-read thermometer: 165°F (74°C) for poultry, 145°F (63°C) for pork. Wash the basket, tray, tongs, and your hands after handling raw meat.
Tip:Dry food crisps; wet food steams. Always pat moisture off before oiling and seasoning, and never overcrowd the basket — air must circulate around each piece.
Check: Internal temperatures read correct at the thickest piece, and the exterior is browned, not pale or rubbery.
Step 7: Clean up and establish a small-kitchen routine
Let the unit cool for at least 30 minutes after cooking. Remove the basket and tray, wash in warm soapy water or place in the dishwasher if the manual says they are dishwasher-safe, and dry. Wipe the interior with a damp cloth to remove grease spatter. Once fully cool and dry, either leave the unit in its spot or store it in its cabinet. Clean after every use — grease buildup causes smoke in later sessions.
Tip:For stuck-on food, fill the basket with warm water and a drop of dish soap and let it soak for 15 minutes before scrubbing. Never use steel wool; it destroys the nonstick coating.
Check: The basket and interior are grease-free and dry, and you have a fixed habit of where the unit lives between uses.
Common Mistakes to Avoid
- Buying an air fryer too big for the counter or cabinet — Measure width, depth, and height clearance before buying, and subtract 2 inches from each dimension to allow ventilation. Write the numbers on your phone and check them against the product specs.
- Running the air fryer plugged into a power strip or shared outlet — Plug directly into a wall outlet on its own circuit. Unplug the microwave or kettle while the air fryer runs if your kitchen has limited outlets.
- Overfilling the basket — Keep food in a single loose layer or below the basket’s max-fill line. Cook in two batches rather than one crowded batch — crowded food steams instead of crisping.
- Skipping cleaning until grease builds up — Wash the basket and tray after every use and wipe the interior weekly. Built-up grease is the number one cause of smoking air fryers and off-tasting food.
Troubleshooting
Problem: The air fryer smokes during cooking
Solution: Smoking usually means greasy food drippings have built up in the pan below the basket. Stop cooking, let the unit cool, pour out collected grease, and wipe the pan. For fatty foods like bacon or wings, add a tablespoon of water or a slice of bread to the pan below the basket to catch drippings.
Problem: Food comes out pale or soggy
Solution: Three likely causes: overcrowding, skipped preheat, or wet food. Cook in a single layer, preheat for 3 minutes, and pat food dry before adding oil. Add 2-3 minutes of cook time before giving up on a recipe.
Problem: The circuit breaker trips when the air fryer runs
Solution: The outlet is sharing a circuit with another high-wattage appliance. Move the air fryer to a different outlet, or make sure the microwave, kettle, and toaster are not running at the same time.
Problem: The basket or tray has a stuck-on coating that will not wash off
Solution: Soak the part in warm soapy water for 15-30 minutes, then scrub with a soft sponge or nylon brush. Make a paste of baking soda and water for stubborn spots. Never use steel wool or put nonstick parts in a self-cleaning oven.
What Success Looks Like
You have succeeded when all of the following are true: the air fryer sits on a stable surface with proper clearance and plugs directly into a wall outlet; the burn-off cycle was completed with no lingering chemical smell; your first batch of fries or other food came out crisp and fully cooked; raw meat reached safe internal temperature; and the basket and interior are clean after use with a set storage spot. If you can repeat the test cook with consistent results and clean the unit in under five minutes, your small-kitchen setup is complete.
Next Steps
Expand what you cook in stages: master frozen foods first, then fresh vegetables, then proteins, then baked items like biscuits or small cakes. Keep a simple log of time and temperature settings that worked for your favorite foods — small air fryers vary in power, and your own notes will beat generic recipes within two weeks. If counter space stays tight, add a slide-proof silicone mat under the unit to protect the counter and make it easy to slide the appliance in and out of storage. Replace the unit if the nonstick coating on the basket starts flaking. If you notice frequent breaker trips even with the air fryer alone, have an electrician check the kitchen circuit before continuing to use the appliance.
Frequently Asked Questions
What size air fryer is best for a really small kitchen?
A 2-3 quart compact model suits one person and counters under 12 inches of clear width. A 4-quart model is the practical maximum for most small kitchens — it still handles two servings while staying around 11-13 inches wide.
Can I put my air fryer under a cabinet?
Not while it is running. The rear vent releases very hot air that can damage cabinets. Store it under a cabinet if you like, but pull it forward so the vent faces open air whenever it is on.
Do I need oil in an air fryer?
Only a light brush or spray of oil on the food, not in the pan. Frozen foods usually need none; fresh potatoes, chicken, and vegetables crisp better with a thin coating.
Can I use the air fryer in a dorm or office kitchen?
Yes, if the outlet is a standard grounded wall outlet and the rules allow cooking appliances. Keep the unit on a stable surface away from paper and clutter, and never leave it unattended while running.
How often do I actually need to clean it?
Wash the basket and tray after every use — it takes two minutes and prevents grease buildup that causes smoke. Wipe the interior cavity weekly or whenever you cook fatty foods.
NFL season / tailgating Picks
team gear
As an affiliate, we earn on qualifying purchases.