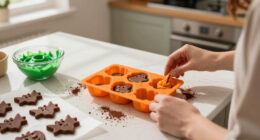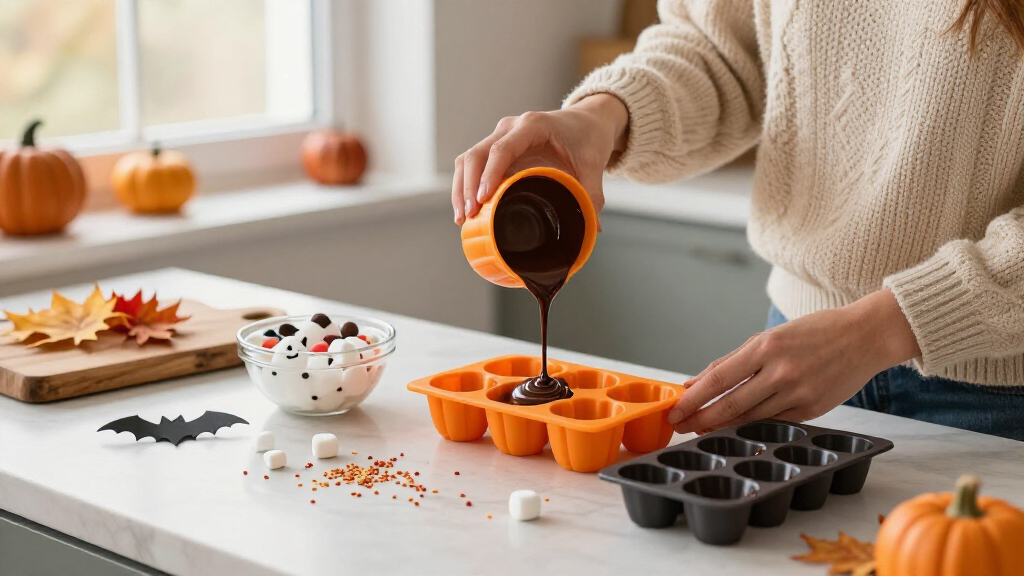
This guide walks you through making Halloween-themed snacks — chocolate pumpkins, ghost-shaped gelatin, frozen yogurt bats, gummy brains, and similar molded treats — using food-safe silicone or plastic molds. You will learn how to prepare the molds, fill them correctly, set the mixture, and release the finished snacks without breakage or loss of detail. The guide covers the two most common methods (chocolate and chilled/gelatin-based snacks) and finishes with cleanup and storage.

Get kitchen staples and gadgets delivered free — and shop member deals
- Fast, free delivery on millions of items
- Access to Prime Big Deal Days deals on October 6–7
- Prime Video, Amazon Music and more included

Halloween Mini Hand Pie Molds Set, 8-Design Spooky for Baking Party
- ✔ Number of Pieces: 8 molds
- ✔ Material: Food-grade BPA-free plastic
- ✔ Designs: Pumpkin, ghost, bat, black cat, witch hat, skull, spider web, haunted house

KASHME 2-Pack Halloween 9-Cavity 3D Ghost Silicone Molds
- ✔ Pieces: 2 molds
- ✔ Cavities: 9 per mold (18 total)
- ✔ Material: Food-grade silicone
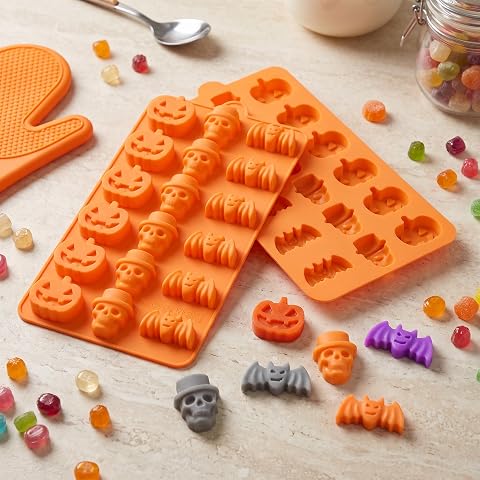
YCylxlyh Pumpkin Silicone Mold 2 Pack – Halloween Pumpkin, Skull & Bat Design Set
- ✔ Pieces: 2 molds
- ✔ Designs: Pumpkin, skull, bat
- ✔ Material: Food-grade silicone
This is written for beginners and home cooks preparing treats for a party, classroom, or family activity. No pastry training is required. Expect about 45–90 minutes of active work plus 30 minutes to 4 hours of chilling, depending on the recipe. By the end, you will have a batch of detailed, clean-edged Halloween snacks that pop out of the mold intact.
Difficulty: Beginner | Time: 45-90 minutes (plus chilling time)
What You’ll Need
Tools & Materials:
- Food-grade silicone or plastic Halloween molds (pumpkins, ghosts, skulls, bats, brains, or similar shapes)
- Microwave-safe bowl or double boiler for melting chocolate
- Rubber spatula (silicone works best for scraping molds)
- Squeeze bottle or piping bag (optional, for precise filling)
- Measuring cups and spoons
- Baking sheet or tray that fits in your freezer or refrigerator
- Small offset spatula or butter knife for leveling
- Candy thermometer (optional, for chocolate work)
- Pastry brush (optional, for detail work)
- Toothpicks for detail work and bubble removal
Knowledge:
- Basic kitchen safety around hot melted chocolate and boiling water
- How to operate a microwave or stovetop double boiler
- Basic measuring of ingredients
Check your mold’s temperature rating before you start. Most silicone molds tolerate -40°F to 446°F, but thin plastic molds may warp above 200°F. If your mold is plastic, melt chocolate gently and never pour anything hotter than warm. Verify the mold is labeled food-safe — some craft molds sold for soap or resin are not rated for food and must not be used for snacks.
Plan your timeline around chilling: chocolate needs 20–30 minutes in the refrigerator, gelatin needs 3–4 hours in the refrigerator, and frozen snacks need 1–2 hours in the freezer. Build this into your party prep.
Halloween Mini Hand Pie Molds Set, 8-Design Spooky for Baking Party
Where the silicone sets shape cold or low-heat treats, this eight-design hand pie mold set goes after the centerpiece snack itself: filled, baked pocket pies. The list of shapes—pumpkin, ghost, bat, black cat, witch hat, skull, spider web, haunted house—covers essentially the entire Halloween iconography, which is why it earns our top spot. A table with four or five different pie designs looks far more deliberate than a platter of identical ghosts.The real differentiator is the one-press cut-seal-crimp action. Anyone who has crimped two dozen empanadas by fork knows it is the most tedious step in pocket-pie baking; collapsing cutting, sealing, and crimping into a single press saves meaningful time when you are baking for a crowd. The BPA-free, dishwasher-safe plastic also holds up to repeated batch use, and the molds double for dumplings, cookies, and empanadas year-round—even if the shapes stay spooky.The tradeoff is fundamental: this is not an oven-safe mold. It shapes dough, then releases it onto a baking sheet. Compared with the KASHME set, which goes straight from freezer to 446°F oven, this option demands an extra step and a steadier hand when transferring raw pies. If your Halloween plan involves chocolate or gummies rather than dough, skip this and go silicone.
Pros:
- Eight distinct Halloween designs—the widest variety in this lineup
- One-press cut, seal, and crimp eliminates the most tedious prep step
- BPA-free, dishwasher-safe plastic built for repeated batch baking
- Doubles for empanadas, dumplings, and cookies beyond October
Cons:
- Not oven-safe—you must release shaped dough onto a sheet before baking
- Plastic presses are less forgiving than silicone if dough sticks
- Strictly Halloween-themed shapes limit off-season use to abstract baking
Best for: Home bakers making filled hand pies, empanadas, or savory pockets for a Halloween party
Not ideal for: Anyone working with chocolate, candy, or frozen treats rather than dough
Bottom line: The most efficient way to turn out a varied, impressive platter of Halloween hand pies without hand-crimping a single one.
“The most efficient way to turn out a varied, impressive platter of Halloween hand pies without hand-crimping a single one.”
KASHME 2-Pack Halloween 9-Cavity 3D Ghost Silicone Molds
If your Halloween prep means melting chocolate or setting gummies rather than rolling dough, the KASHME ghost set is the sharper tool. Two molds with nine cavities each give you 18 treats per pour—double the throughput of the YCylxlyh set’s design-per-tray approach—which matters enormously when you are filling party bags for a classroom.The standout feature is that the ghosts are genuinely 3D figures at 1.85 inches tall, not flat impressions. Flat silicone designs read as smudges once a chocolate is unwrapped; a dimensional ghost holds its shape visually on a dessert table. The -40°F to 446°F temperature range also opens freezer projects like themed ice cubes and pudding sets, and the non-stick surface releases without greasing—no broken chocolate faces, which is the single most common failure point with budget candy molds.Compared with the hand pie set, the limitation is obvious: one shape only. You will produce beautiful ghosts and nothing else, so this works best as a specialist alongside other treats rather than your sole mold. It also earns points beyond the kitchen—soap, wax, and resin compatibility makes it genuinely useful for craft-heavy Halloween celebrations.
Pros:
- 18 total cavities—the highest batch capacity in this comparison
- True 3D ghost figures with visible depth, not flat impressions
- -40°F to 446°F range covers freezer, oven, and everything between
- Non-stick release without greasing or residue; also craft-safe for soap and resin
Cons:
- Single design means a one-look party table
- Silicone trays can flex and spill when moved full—use a baking sheet underneath
- 1.85-inch figures are smaller than some buyers expect
Best for: Candy and chocolate makers producing large batches of one polished, dimensional treat
Not ideal for: Bakers who want multiple Halloween designs or shaped baked goods
Bottom line: The most efficient pick for turning out dozens of detailed 3D chocolate ghosts in a single afternoon.
“The most efficient pick for turning out dozens of detailed 3D chocolate ghosts in a single afternoon.”
YCylxlyh Pumpkin Silicone Mold 2 Pack – Halloween Pumpkin, Skull & Bat Design Set
The YCylxlyh 2-pack takes the opposite bet from KASHME: instead of mastering one shape, it spreads three designs—pumpkin, skull, and bat—across two trays. If your goal is a mixed candy board where guests can pick a favorite, that variety beats depth, and it does so at a lower commitment level than buying multiple single-shape sets.Materially, it matches KASHME spec for spec: the same food-grade silicone, the same -40°F to 446°F tolerance, the same flexible non-stick release. That means the choice between these two comes down entirely to variety versus volume—three looks at a slower batch pace, or one look at 18 cavities a pour. We would point first-time Halloween hosts here, because a spread of pumpkins, skulls, and bats in chocolate and gummy form looks intentional even in small quantities.The honest weaknesses: fewer cavities means more pouring rounds for big events, and the flat designs lack the dimensional punch of KASHME’s 3D ghosts. The listing is also newer, so long-term durability is unverified—a reasonable gamble for an occasional-season tool, but worth knowing. Against the hand pie set, it shares the advantage of true oven-to-freezer flexibility but cannot produce a filled, baked snack on its own.
Pros:
- Three Halloween designs in one affordable set—more variety per dollar than rivals
- Full -40°F to 446°F range with oven, microwave, freezer, and dishwasher use
- Flexible non-stick silicone releases candy and chocolate cleanly
- Handles food and craft projects alike, from gummies to candles and soap
Cons:
- Fewer total cavities than KASHME, so large batches take multiple rounds
- Flat designs lack the dimensional detail of 3D ghost figures
- Very new listing, so long-term durability is unproven
Best for: Casual hosts and first-time Halloween makers who want variety across candy, ice, and crafts
Not ideal for: High-volume candy makers or anyone needing one shape in bulk
Bottom line: The smartest entry point if you want a varied Halloween candy board without committing to bulk production.
“The smartest entry point if you want a varied Halloween candy board without committing to bulk production.”
As an Amazon Associate we earn from qualifying purchases.
Before You Start
Decide which type of snack you are making before you begin, because the filling and setting steps differ:
- Chocolate molds: melted chocolate or candy melts, set by refrigeration. Best for pumpkins, skulls, and ghosts with painted details.
- Gelatin or gummy molds: flavored gelatin or gummy mixture, set by refrigeration. Best for brains and worms.
- Frozen snack molds: yogurt, juice, or blended fruit, set by freezing. Best for simple, bold shapes like bats and ghosts.
Wash and fully dry your molds before use, even if they are new. Water residue is the most common cause of cloudy chocolate and sticking gelatin. Dry each cavity with a paper towel and let them air-dry for 10 minutes afterward to be certain.
Clear refrigerator or freezer shelf space now. You will need a flat surface large enough for the tray holding your filled molds — moving filled molds later risks spills.
Step-by-Step Instructions
Step 1: Select and inspect your molds
Lay out your molds on a flat counter and inspect each cavity for cracks, scratches, or residue from previous use. Press on the silicone to confirm it is flexible with no stiff or torn spots. Choose molds with bold, shallow-to-medium detail for your first batch — deep, intricate shapes like brains with fine grooves release more cleanly once you have practice.
Tip: If you are making multiple shapes, group them by filling type so you can pour one mixture across several molds in a single session.
Check: Each cavity is clean, dry, intact, and sits flat on the counter without rocking.
Step 2: Prepare and flavor your filling
For chocolate snacks: chop chocolate into small, even pieces and melt in a microwave-safe bowl at 50% power in 30-second bursts, stirring after each burst, until smooth. Stop while a few small pieces remain and stir until they melt — this prevents overheating, which makes chocolate grainy. For gelatin snacks: dissolve the gelatin powder in boiling water per the package, stir for 2 full minutes, then add cold water or juice. For frozen snacks: blend yogurt, fruit, or juice until pourable and lump-free.
Tip: For chocolate, add a half-teaspoon of vegetable oil or coconut oil per cup of chocolate to thin it slightly. Thinner chocolate flows into fine mold details and releases more cleanly.
Check: Chocolate is smooth and glossy with no lumps; gelatin is fully dissolved with no gritty residue on the spoon; frozen mix pours easily.
Step 3: Fill the mold cavities
Place the molds on a baking sheet first — this gives you a rigid carrier. Spoon or pour the filling into each cavity, filling to just below the rim. Use a squeeze bottle or piping bag for small or detailed cavities. Tap the tray firmly on the counter 5–10 times to release trapped air bubbles, which otherwise leave holes on the surface of the finished snack. If bubbles cling to detailed areas, poke them with a toothpick.
Tip: For two-tone chocolate (orange pumpkin with a green stem), paint the stem detail with a small brush using melted green candy melt, chill for 5 minutes until set, then fill the rest of the cavity with orange.
Check: Every cavity is filled level or slightly below the rim, with no visible air bubbles at the surface.
Step 4: Level and clean the surface
Run an offset spatula or the straight edge of a butter knife across the top of the mold, scraping off excess filling so each cavity is level with the mold surface. Wipe any drips off the mold exterior with a damp paper towel. A flat, clean top edge is what lets the finished snack stand upright and release without torn edges.
Tip: Do not skip leveling for gelatin — an uneven base makes the finished snack wobble and look unfinished.
Check: The mold top is smooth and clean, with no filling mounded above or smeared across the cavities.
Step 5: Chill or freeze until fully set
Transfer the baking sheet with the filled molds to the refrigerator or freezer, keeping it level. Refrigerate chocolate for 20–30 minutes, refrigerate gelatin for 3–4 hours, and freeze frozen snacks for 1–2 hours. Do not shorten the chilling time — partially set snacks tear and lose detail when unmolded.
Tip: Chocolate is fully set when it looks uniformly matte and has pulled slightly away from the edges of the cavity. Gelatin is set when the center does not jiggle when you gently shake the tray.
Check: Chocolate is matte and firm with no shiny wet spots; gelatin is springy across the whole surface; frozen snacks are solid throughout.
Step 6: Unmold the snacks
Remove the tray from the refrigerator or freezer. For flexible silicone molds, place the mold flat on the counter, press up on the underside of one cavity with your thumb while peeling the mold away from the snack, and let the snack drop onto a clean plate or parchment paper. Work from one edge rather than forcing the center. For rigid plastic molds, invert the whole mold over a plate and tap firmly on the back; if a snack resists, flex the plastic gently or run warm water briefly over the underside of the mold (never the top) to release it.
Tip: For frozen snacks, let the mold sit at room temperature for 2–3 minutes before unmolding — this softens the outer layer just enough to release cleanly.
Check: Each snack releases whole, with sharp edges and visible detail. Broken or detail-less snacks usually mean under-chilling or rushed unmolding.
Step 7: Decorate and finish (optional)
If you want faces or accents, use melted candy melts applied with a toothpick or small brush, or press small candy eyes onto chilled chocolate while it is still slightly tacky from handling. Let all added decoration set for 5–10 minutes in the refrigerator before plating or packaging.
Tip: Work in small batches when decorating so the chocolate surface stays cool and the added pieces adhere.
Check: Decorations are attached firmly and do not slide or smear when you lift the snack.
Step 8: Clean and store the molds
Wash molds in warm soapy water immediately after use, using a soft brush to get into detailed grooves. Rinse thoroughly and dry completely before stacking or storing. Store silicone molds flat or loosely rolled — never folded tightly, which creates creases that show up in your next batch. Store snacks in an airtight container: chocolate at cool room temperature for up to 2 weeks, gelatin refrigerated for up to 5 days, frozen snacks in the freezer for up to 1 month.
Tip: Never use abrasive scrubbers on molds — scratches trap residue and show up as flaws in future snacks.
Check: Molds are dry, residue-free, and stored without creases; snacks are sealed and labeled with the date.
Common Mistakes to Avoid
- Overheating chocolate in the microwave, causing a grainy, clumpy texture. — Melt at 50% power in 30-second bursts, stirring between each, and stop while a few pieces remain solid. Carry-over heat finishes the melting as you stir.
- Getting water into melted chocolate, which makes it seize into a stiff paste. — Dry every bowl, spatula, and spoon before use, and never cover melting chocolate where condensation can drip back in. Work with a completely dry mold.
- Unmolding before the filling is fully set, producing torn, half-shaped snacks. — Follow the full chilling times and use the matte-and-firm check for chocolate and the no-jiggle check for gelatin before attempting release.
- Filling cold gelatin into molds too early, so it sets unevenly with lumps. — Let gelatin cool to just-warm (it should feel barely warm on your wrist and still pour smoothly) before filling the molds, then chill immediately.
Troubleshooting
Problem: Chocolate snacks have dull, streaky, or white blotchy surfaces (bloom).
Solution: This is usually moisture or temperature shock. The snacks are safe to eat. To prevent it next time, keep chocolate at gentle melting temperatures and chill at moderate refrigerator temperature rather than the freezer. For coated, glossy results, remelt and re-temper the chocolate.
Problem: Snacks stick in the mold and break during release.
Solution: Chill 10 more minutes and try again. For silicone, push from the underside directly beneath the stuck area. For plastic, briefly run warm water over the underside of the mold. If sticking repeats, lightly brush the cavities with a thin coat of neutral oil before filling.
Problem: Finished snacks have missing detail — smooth spots where grooves should be.
Solution: Air or thick filling never reached the fine details. Next batch, thin the chocolate with a half-teaspoon of oil per cup, tap the tray longer after filling, and use a toothpick to nudge filling into corners before chilling.
Problem: Gelatin snacks weep liquid or sag after unmolding.
Solution: The gelatin was under-measured or the snacks got too warm. Return them to the refrigerator immediately, and next batch use the full amount of gelatin the package specifies — do not stretch it with extra water.
What Success Looks Like
Your batch is successful when:
- Each snack releases from the mold whole, with no torn edges or missing pieces.
- Surface detail (faces, grooves, ridges) is crisp and visible on every piece.
- Chocolate snacks are firm and matte; gelatin snacks hold their shape at room temperature for at least 20 minutes; frozen snacks hold together when lifted.
- The snacks stand upright on a flat plate without wobbling.
- The molds come out of the process clean and undamaged, ready for the next batch.
Next Steps
Once you have a clean first batch, expand from there:
- Build a party spread: repeat the process with 2–3 different mold shapes and filling types — chocolate skulls, gummy brains, and frozen yogurt ghosts together cover most tastes and dietary needs.
- Package as favors: wrap chocolate snacks individually in treat bags with orange and black ribbon; keep them at cool room temperature.
- Try layered effects: chill one layer partially, then add a contrasting color layer on top for striped pumpkins or two-tone ghosts.
- Prep ahead: gelatin and frozen snacks can be made 1–2 days before an event; make chocolate up to a week ahead if stored somewhere cool.
- When to replace molds: retire any mold with cracks, permanent cloudiness, or scratches — flaws transfer directly to your snacks.
Frequently Asked Questions
Can I use any craft mold for food, or does it need to be food-safe?
Only use molds explicitly labeled food-safe. Molds sold for soap, candles, or resin may contain materials not rated for contact with food. Food-grade silicone and food-rated plastic molds are inexpensive and widely available, so there is no reason to take the risk.
Do I need to grease the molds first?
Usually not. Silicone molds and well-made plastic molds release cleanly when the filling is fully set. Add a thin brush of neutral oil only if you have repeated sticking problems, and wipe out any excess so it does not dull the surface of the snack.
Can I put the molds in the freezer to speed up setting?
Chocolate can go in the freezer for 10–15 minutes in a pinch, but longer chilling can cause bloom (white streaks). Gelatin sets better in the refrigerator — freezing ruins its texture. Frozen snacks, of course, belong in the freezer by design.
How far in advance can I make Halloween snacks with molds?
Chocolate snacks keep up to 2 weeks at cool room temperature in an airtight container. Gelatin snacks last 3–5 days refrigerated. Frozen snacks hold for about a month sealed in the freezer. For best appearance, decorate chocolate within a day or two of serving.
Why did my chocolate turn dull or streaky after chilling?
That is called bloom, caused by moisture or temperature swings. The snacks are perfectly safe to eat. Prevent it by keeping water away from the melted chocolate and chilling at standard refrigerator temperature rather than freezing. Professional-looking gloss requires tempered chocolate, but a small amount of oil in the melts gets close for home use.
NFL season / tailgating Picks
team gear
As an affiliate, we earn on qualifying purchases.