To make artisan sourdough simple, start by creating and nurturing a lively starter with natural enzymes and wild yeast, ensuring bubbles and a tangy smell. Manage fermentation carefully through stretching, folding, and temperature control to develop flavor and gluten strength. Use proper equipment like banneton baskets and Dutch ovens to shape and bake with steam for crust and texture. Keep practicing each step, and soon you’ll master turning basic ingredients into bakery-quality bread—more tips await as you continue.
Key Takeaways
- Develop a healthy, bubbling sourdough starter through patience and regular feedings for optimal fermentation.
- Use proper techniques like stretching and folding during bulk fermentation to strengthen gluten and improve crumb.
- Control fermentation temperature to balance flavor development and dough rise.
- Employ quality equipment such as banneton baskets and Dutch ovens to shape and bake for professional results.
- Achieve bakery-quality sourdough at home by mastering fermentation, handling, and baking for a flavorful, crusty loaf.
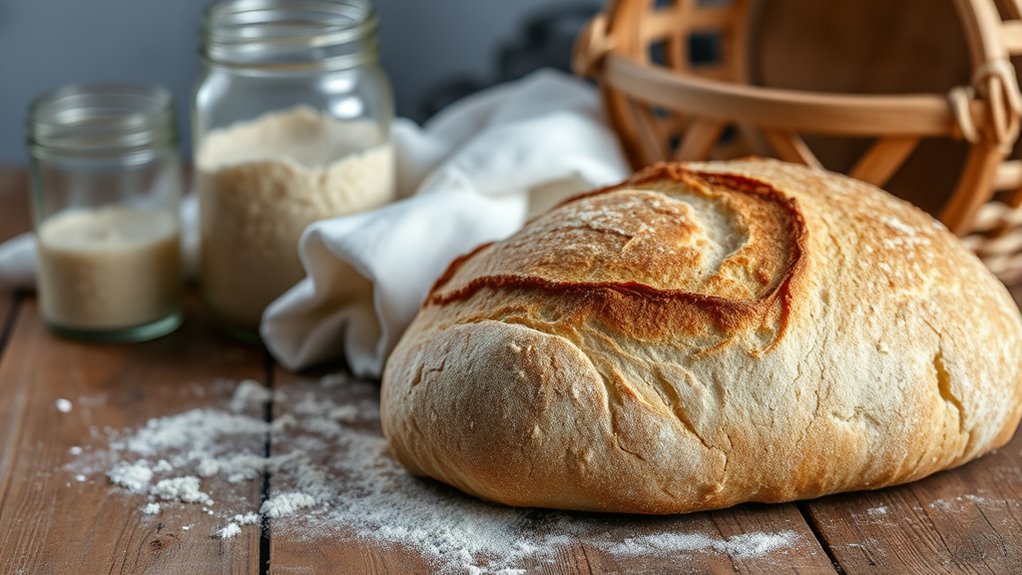
Have you ever wondered what makes artisan sourdough bread so uniquely flavorful and inviting? It all comes down to the fermentation techniques and the right baking equipment. When you understand how fermentation works, you *uncover* the secret to developing that complex tang, chewy texture, and beautiful crust. Fermentation isn’t just a step; it’s the heart of sourdough. By allowing the dough to ferment slowly, you encourage natural enzymes and wild yeast to work their magic. This process transforms simple flour and water into a lively, flavorful dough that’s rich in character. To get the best results, you need the right baking equipment—things like a banneton basket for shaping, a Dutch oven for baking, and a digital scale for precision. These tools help you maintain consistency and create a professional-quality loaf in your own kitchen.
Master fermentation techniques and essential baking tools to craft authentic artisan sourdough bread at home.
Starting with fermentation, you want to cultivate a healthy starter. This involves combining flour and water and letting it sit at room temperature, giving wild yeast and bacteria time to develop. Over days, you’ll notice bubbles forming and a tangy aroma, indicators that your starter is alive and active. The key is patience; the longer you let the fermentation go, the more complex the flavor becomes. When it’s ready, you’ll see it double in size and have a bubbly, slightly sour smell. The microbial activity in your starter is what produces the distinctive sour notes and aroma. During the bulk fermentation stage, you’ll stretch and fold the dough periodically to strengthen its gluten structure, which is *essential* for a good rise and open crumb. This process can take several hours, depending on temperature and the strength of your starter. Additionally, understanding the importance of fermentation techniques can help you optimize the flavor development and dough handling. Incorporating temperature control is also crucial for managing fermentation speed and consistency. Proper fermentation profoundly impacts the development of flavor compounds through enzymatic activity, which enhances aroma and taste.
Your choice of baking equipment makes a noticeable difference. Using a banneton basket helps shape the dough into a beautiful round, while a Dutch oven traps steam, creating that signature crunchy crust. Proper tools make handling sticky dough easier and improve the final appearance and texture of your bread. The oven’s heat should be high enough to develop a deep caramelization, giving the crust its irresistible color. Preheating your baking vessel ensures even heat distribution, which is *vital* for a professional look and crunch. Additionally, understanding the importance of contrast ratio can help you optimize your oven settings and lighting conditions for the best baking results.
In the end, mastering fermentation techniques combined with the right baking equipment transforms basic ingredients into a loaf that’s bursting with flavor and character. It’s a process that rewards patience and attention to detail, but the satisfying aroma, taste, and texture of your homemade sourdough will make every effort worthwhile. With a little practice, you’ll produce artisan sourdough that rivals bakery-quality bread, all from your own kitchen.
Frequently Asked Questions
How Long Does It Take to Develop a Strong Sourdough Starter?
It typically takes about 5 to 7 days to develop a strong sourdough starter. During this fermentation timeline, you’ll notice bubbles and a pleasant sour smell, indicating starter maturity. Keep feeding it daily with equal parts flour and water, and maintain a warm environment. With patience, your starter will become lively and robust, ready to leaven delicious bread. Consistent care guarantees a healthy, strong fermentation process.
Can I Make Sourdough Bread Without a Dedicated Starter?
Yes, you can make sourdough bread without a dedicated starter by using commercial yeast and bread improvers. Mix these with flour, water, and salt, then let the dough ferment for a shorter period. This method speeds up the rising process and mimics traditional sourdough flavor, though it won’t have the same tang or complexity. It’s a quick alternative if you don’t want to maintain a regular sourdough starter.
What Are Common Signs of a Healthy Sourdough Starter?
A healthy sourdough starter shows active fermentation activity with lots of bubbles and a doubling in size within 4-6 hours. Its appearance should be bubbly and somewhat frothy, and the smell should be pleasantly tangy or yeasty, not off or rotten. If your starter is consistently bubbly, has a pleasing aroma, and rises well, it’s thriving and ready for baking.
How Do I Troubleshoot a Sourdough That’s Not Rising?
Your sourdough’s acting like a lazy cat? Check your starter hydration—maybe it’s too dry or too wet, throwing off the balance. Then, consider fermentation temperature: if it’s too cold, yeast and bacteria go into hibernation, preventing rising. Warm it up gently, around 75-80°F, and give it more time. With proper hydration and cozy warmth, your dough will rise, transforming into that bubbly, airy masterpiece you crave.
What Are the Best Storage Methods for Leftover Sourdough Starter?
You should store your leftover sourdough starter in the fridge, tightly covered to prevent drying out. Before refrigerating, feed the starter to keep it active, and remember to feed it regularly—about once a week if stored long-term. When you’re ready to use it again, take it out, let it warm, and feed it to revive its activity. Proper storage helps maintain a healthy, ready-to-use starter.
Conclusion
With patience and practice, your sourdough journey transforms from a fragile seed into a mighty loaf, much like a sculptor shaping clay into art. Embrace each step, from nurturing your starter to mastering the bake, and you’ll find yourself crafting bread that’s more than just food—it’s a living proof of your dedication. Remember, every loaf is a story written in flour and water, waiting to be savored and shared.